
개발자를 향해...
[초보자를 위한 리덕스 101] #0.1 🚨 Read this First 🚨 ~ #1.1 Store and Reducer 본문
[초보자를 위한 리덕스 101] #0.1 🚨 Read this First 🚨 ~ #1.1 Store and Reducer
eugeneHwang1124 2021. 3. 5. 14:24본 글은 노마드코더 님의 [초보자를 위한 리덕스 101]을 수강하며 작성하였습니다.
#0.1 🚨 Read this First 🚨
-
#0.2 Introduction
강의에서는 Redux를 vanilla js와 배우고 그 다음에는 react와 함께 배울 것이다.
#0.3 Requirement
Redux를 사용하는 이유와 왜 만들어졌는지, 우리의 어플리케이션을 어떻게 향상시키는지 알아볼 것이다.
강의에서는 React, git, chrome, vscode를 가지고 있어야한다.
#0.4 Project Setup
깃헙에 들어가서 레포지토리를 하나 생성하자.
그리고 터미널을 켜고 원하는 위치에 들어가서 npx create-react-app vanilla-redux를 입력한다.
파일로 들어가서 src폴더에서 index.js파일만 남기고 나머지는 지워준다. 그리고 index.js파일의 내용을 다 지운다.
이제 깃에 모든 파일을 올려준다.
#0.5 Vanilla Counter
우리는 webpack을 사용할 것이기 때문에 index.html로 가서 코드를 다음처럼 정리한다.
<!DOCTYPE html>
<html lang="en">
  <head>
    <meta charset="utf-8" />
    <link rel="icon" href="%PUBLIC_URL%/favicon.ico" />
    <meta name="viewport" content="width=device-width, initial-scale=1" />
    <meta name="theme-color" content="#000000" />
    <meta
      name="description"
      content="Web site created using create-react-app"
    />
    <link rel="apple-touch-icon" href="%PUBLIC_URL%/logo192.png" />

    <link rel="manifest" href="%PUBLIC_URL%/manifest.json" />

    <title>Vanilla Redux</title>
  </head>
  <body>
  </body>
</html>
그리고 body 부분에 간단한 어플리케이션을 만든다.
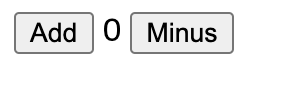
버튼을 두개 만들고 값을 더하거나 뺄 수 있는 기능을 넣어보자.
  <body>
    <button>Add</button>
    <span>0</span>
    <button>Minus</button>
  </body>
우선 이렇게 버튼을 생성한다. 아직 아무 기능이 없다.
이제 각 버튼에 id를 부여하고 index.js에서 이 아이디를 이용해 호출해보자.
그리고 각 버튼에 대해 함수를 생성하고 콘솔을 출력하도록 해본다.
const add=document.getElementById("add");
const minus =document.getElementById("minus");
const number =document.querySelector("span");


const handleAdd=()=>{
  console.log("add")
}

const handleMinus=()=>{

}

add.addEventListener("click", handleAdd);
minus.addEventListener("click", handleMinus)


//index.html body 부분

  <body>
    <button id="add">Add</button>
    <span>0</span>
    <button id="minus">Minus</button>
  </body>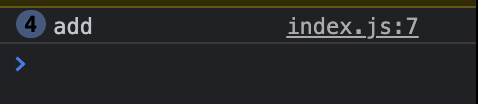
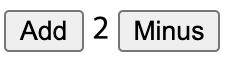
이제 버튼이 눌리면 숫자가 늘어나도록 해보자.
횟수를 세는 변수를 선언한다. 그리고 변수를 span과 연결시킨다. 그리고 add 버튼이 눌릴 때마다 값이 증가하도록 해보자.
let count =0;

number.innerText=count;

const handleAdd=()=>{
  count =count+1;
}

const handleMinus=()=>{
  count=count-1;
}
실행해보면 아무것도 바뀌지 않는다. 버튼이 눌릴 때마다 숫자 값이 바뀌도록 해주어야한다.
값을 다시 적용해주는 함수를 만들어서 버튼이 눌리면 실행시켜주자.
let count =0;

number.innerText=count;

const updateText =()=>{
  number.innerText=count;
}

const handleAdd=()=>{
  count =count+1;
  updateText();
}

const handleMinus=()=>{
  count=count-1;
  updateText();
}
이제 값이 바뀌는 것을 볼 수 있다.
# 1.1 Store and Reducer
Store을 사용해서 데이터 상태를 저장해보자.
앞에서는 count 변수의 값을 바꾸기 위해 코드를 작성했었다. reducer는 우리의 데이터를 modify 하는 데이터이다. 따라서 변수를 선언해주고 원래 함수들은 지워주자.
import {createStore} from "redux";

const add=document.getElementById("add");
const minus =document.getElementById("minus");
const number =document.querySelector("span");

const countModifier=()=>{
  return "hello";
};
const counstStore =createStore(countModifier);

console.log(counstStore)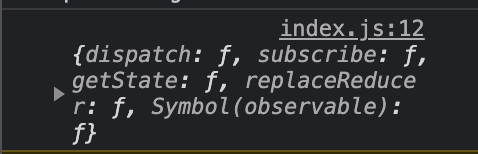
보면 5개의 함수가 있다는 것을 알 수 있다.
만약 countStore의 getstate()를 출력하면

이렇게 데이터를 보여준다. 데이터를 수정할 수 있는것은 countModifier 뿐이다.
import {createStore} from "redux";

const add=document.getElementById("add");
const minus =document.getElementById("minus");
const number =document.querySelector("span");

const countModifier=(state=0)=>{
  console.log(state)
  return 1;
};
const countStore =createStore(countModifier);
여기서 countModifier 안에서 state를 변경시켜줄 것이다.
'웹 자바스크립트 공부 > ReactJS + node.js' 카테고리의 다른 글
| [초보자를 위한 리덕스 101] #2.0 Vanilla ToDo ~ #2.1 State Mutation (0) | 2021.03.09 |
|---|---|
| [초보자를 위한 리덕스 101] #1.2 Actions ~#1.4 Recap Refactor (0) | 2021.03.09 |
| [React Native로 날씨앱 만들기] #2.3 Background Gradient ~ #2.5 Conclusions (0) | 2021.02.27 |
| [React Native로 날씨앱 만들기] #2.0 Displaying Temperature ~ (0) | 2021.02.26 |
| [React Native로 날씨앱 만들기] #1.3 Asking for Permissions ~ #1.4 Getting the Weather (0) | 2021.02.26 |


