
개발자를 향해...
[초보자를 위한 리덕스 101] #1.2 Actions ~#1.4 Recap Refactor 본문
[초보자를 위한 리덕스 101] #1.2 Actions ~#1.4 Recap Refactor
eugeneHwang1124 2021. 3. 9. 12:36본 글은 노마드코더 님의 [초보자를 위한 리덕스 101]을 수강하며 작성하였습니다.
#1.2 Actions
count modifier에게 액션을 주기 위해서 countStore을 이용하는 방법이 있다.
import {createStore} from "redux";

const add=document.getElementById("add");
const minus =document.getElementById("minus");
const number =document.querySelector("span");

const countModifier=(count=0,action)=>{
  console.log(action);
  return 1;
};
const countStore =createStore(countModifier);

  countStore.dispatch({type:"HELLO!"});
실행결과는 다음과 같다.

countModifier가 두번 호출되었는데 한번은 초기화 될 때 호출되고 한번은 type이라는 다른 액션과 함께이다.
이제 type의 값에 따라 조건문으로 다른 명령어를 실행시켜줄 수 있다.
import {createStore} from "redux";

const add=document.getElementById("add");
const minus =document.getElementById("minus");
const number =document.querySelector("span");

const countModifier=(count=0,action)=>{
  if(action.type==="ADD"){
    return count+1;
  }
  return count;
};
const countStore =createStore(countModifier);

countStore.dispatch({type:"ADD"});

console.log(countStore.getState())
이렇게 countModifier와 커뮤니케이트할 수 있어야한다.
#1 3 Subscriptions
이제 dispatch를 버튼에 연결시켜야한다.
위 코드에서 다음과 같은 이벤트 리스너 함수로 연결시킬 수 있다,
const handleAdd=()=>{
  countStore.dispatch({type:"ADD"});
  console.log(countStore.getState())
}

const handleMinus=()=>{
  countStore.dispatch({type:"MINUS"});
  console.log(countStore.getState())
}

add.addEventListener("click", handleAdd);
minus.addEventListener("click", handleMinus);
그러나 이런 방법으로는 html에 변경된 것을 업데이트 하는것을 알릴 수 없다.
countStore을 출력해보면 dispatch 뿐만 아니라 다양한 함수들이 있는 것을 볼 수 있다. 이 중에서 subscribe는 우리에게 값의 변화를 알려준다.
const onChange=()=>{
  console.log("변화감지");
}

countStore.subscribe(onChange)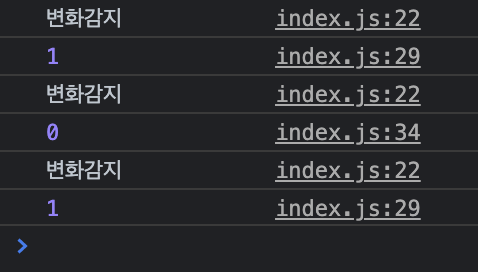
버튼을 눌러 값이 바뀔때마다 onChange함수가 실행된다.
import {createStore} from "redux";

const add=document.getElementById("add");
const minus =document.getElementById("minus");
const number =document.querySelector("span");

const countModifier=(count=0,action)=>{
  if(action.type==="ADD"){
    return count+1;
  }
  else if(action.type==="MINUS"){
    return count-1;
  }
  else{
    return count;
  }
  return count;
};
const countStore =createStore(countModifier);

const onChange=()=>{
  console.log("변화감지");
  number.innerText=countStore.getState();
}

countStore.subscribe(onChange)

const handleAdd=()=>{
  countStore.dispatch({type:"ADD"});
  console.log(countStore.getState())
}

const handleMinus=()=>{
  countStore.dispatch({type:"MINUS"});
  console.log(countStore.getState())
}

add.addEventListener("click", handleAdd);
minus.addEventListener("click", handleMinus);
#1.4 Recap Refactor
reducer가 리턴하는 것이 뭐든간에 applicatoin의 state가 된다.
이 때, 코드를 약간 편리하게 발전시킬 수 있다
우선 여기서 if else문은 swich로 바꾸어 사용하는 것이 공식문서에서 사용된다.
const countModifier=(count=0,action)=>{
  switch(action.type){
    case "ADD":
      return count+1;
    case "MINUS":
      return count-1;
    default:
      return count;
  }
};
그리고 ADD, MINUS와 같은 단어를 쓸 때 스펠링에 오류가 발생할 수 있다. 문제는 이런 스펠링 오류는 콘솔창에서 에러를 출력해주지 않기 때문에 에러가 난 이유를 발견하기 어렵다. 이를 위해 const를 통해 string을 대치해주자.
import {createStore} from "redux";

const add=document.getElementById("add");
const minus =document.getElementById("minus");
const number =document.querySelector("span");

const ADD ="ADD";
const MINUS="MINUS";

const countModifier=(count=0,action)=>{
  switch(action.type){
    case ADD:
      return count+1;
    case MINUS:
      return count-1;
    default:
      return count;
  }
};
const countStore =createStore(countModifier);

const onChange=()=>{
  number.innerText=countStore.getState();
}

countStore.subscribe(onChange)

const handleAdd=()=>{
  countStore.dispatch({type:ADD});
}

const handleMinus=()=>{
  countStore.dispatch({type:MINUS});
}

add.addEventListener("click", handleAdd);
minus.addEventListener("click", handleMinus);'웹 자바스크립트 공부 > ReactJS + node.js' 카테고리의 다른 글
| [초보자를 위한 리덕스 101] #2.2 Delete To Do ~ #2.4 Conclusions (0) | 2021.03.09 |
|---|---|
| [초보자를 위한 리덕스 101] #2.0 Vanilla ToDo ~ #2.1 State Mutation (0) | 2021.03.09 |
| [초보자를 위한 리덕스 101] #0.1 🚨 Read this First 🚨 ~ #1.1 Store and Reducer (0) | 2021.03.05 |
| [React Native로 날씨앱 만들기] #2.3 Background Gradient ~ #2.5 Conclusions (0) | 2021.02.27 |
| [React Native로 날씨앱 만들기] #2.0 Displaying Temperature ~ (0) | 2021.02.26 |

